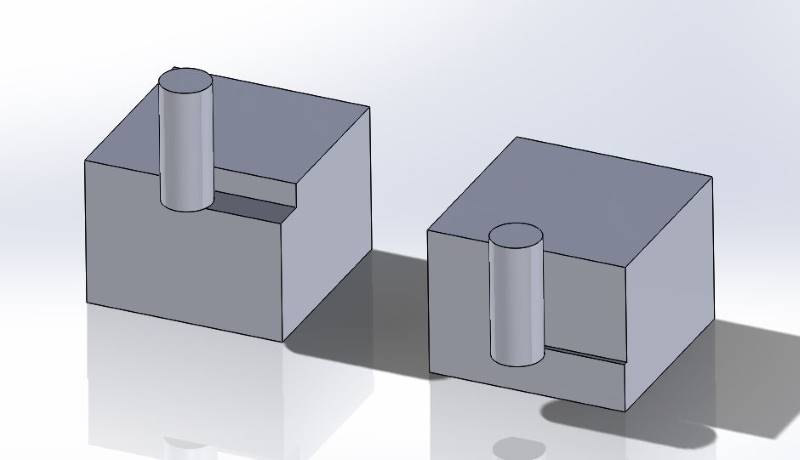
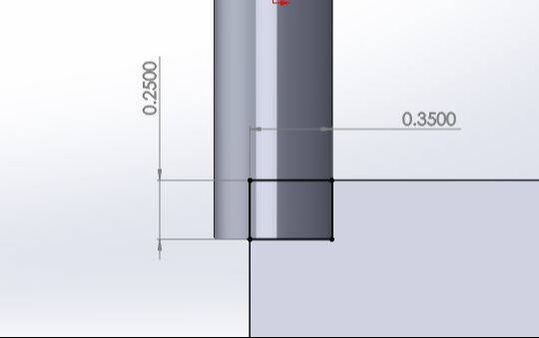
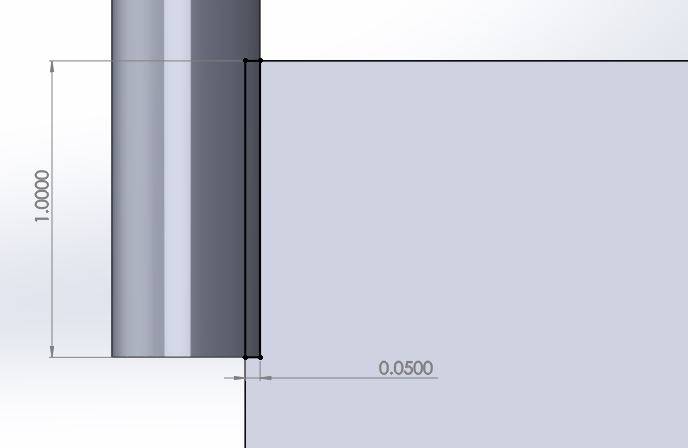
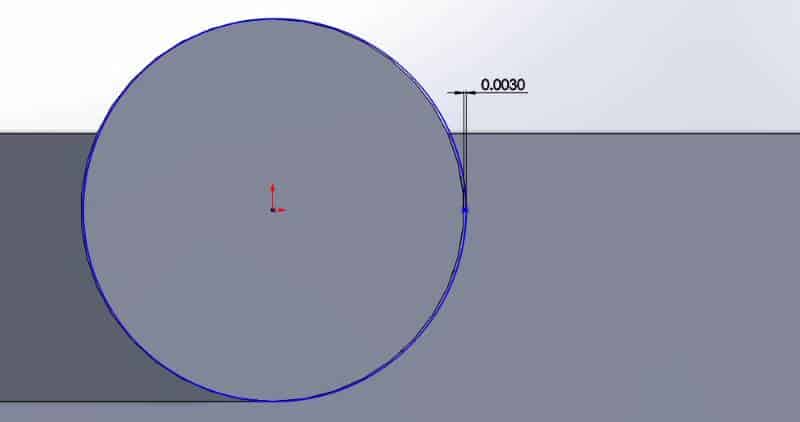
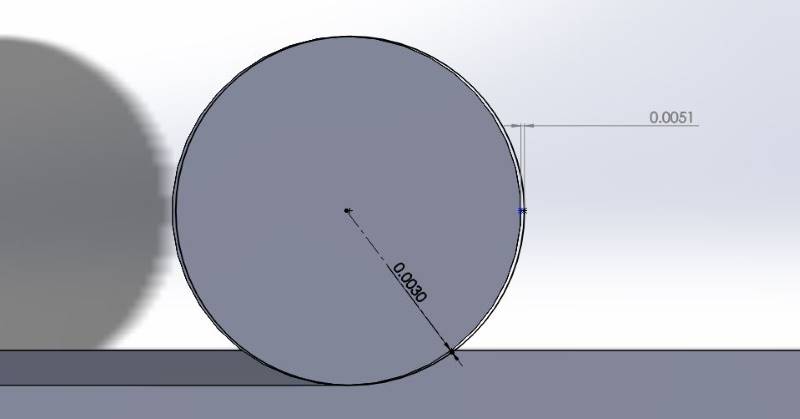
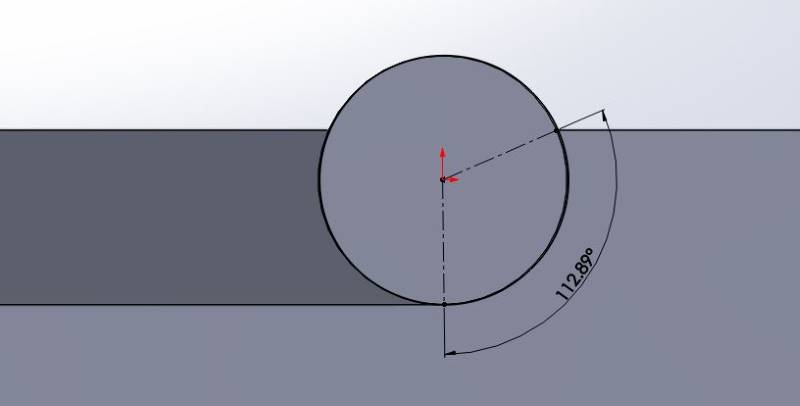
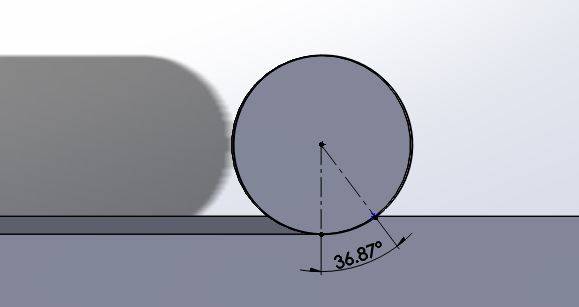
 Written by: Jonathan Maes Originally Published on "Make it from Metal" Jonathan has been working in manufacturing and repair for the past 12 years. His specialty is machining. He manages a machine shop with multiaxis CNC machines for aerospace and medical prototyping and contract manufacturing. This is the first of a two part series. This part will discuss the fundamentals of Trochoidal and Peel Milling and the next part will discuss what is required for Peel and Trochoidal Milling covering toolholders, cutting tools and cam systems All the aspects of high speed machining can be a real challenge to wrap your head around. Filtering through what’s real and what’s just a buzzword can be a chore in and of itself. So is peel milling a technique worth learning? Definitely. Peel milling is an approach that uses high feed rates, low radial depth of cut and high axial depth of cut. It relies heavily on the principle of chip thinning, using a tool path that maximizes tool wear along the entire flute length. Trochoidal peel milling is a particular type of motion – a circular high speed maneuver that is excellent for carving out deep slots and other narrow features. Ok, that was pretty packed with information. Let’s break that up and use a few diagrams to explain what’s going on, how to do it properly, and how to know when your application justifies it. Peel Milling Principles The basic idea here is to use a small stepover, usually around 10% of the tool’s diameter, but max out the Z depth. Of course, when using this method in the real world, you’re best off consulting the cutting tool manufacturer for recommended cutting parameters, but these numbers are usually pretty realistic. For example, if you have a 0.500″ endmill, you’ll cut at a depth of 1.0″ but with a stepover of 0.050″. Compare that to a standard approach of cutting with a depth of 0.250″ and a stepover of 70%, or 0.350″. Now if we look at the area of cutting engagement, we can work out what kind of stock removal we can get. For the standard milling approach, we’re cutting an area that’s 0.250″ x 0.350″, or an area of 0.0875 square inches. For the peel milling approach, we’re cutting an area that’s 0.050″ x 1.000″, or 0.050 square inches. At this point, it’s not too impressive, is it? Peel milling doesn’t have nearly the same engagement as the traditional approach. But there’s a secret sauce. Peel milling can take advantage of something called chip thinning. If you take a look at the size of chip that you get with such a low radial engagement, you’ll realize that it’s actually super thin. What this means is that you can crank up the feed rate to get a normal chip thickness. According to those sketches, you can cut the material with a 70% higher feed rate and have the same chip thickness as the “traditional machining” model. Now let’s convert those previous examples from 2D area to 3D volume. To do this, we’ll need to add some material data to come up with realistic feed rates. Let’s say that we’re cutting 4140 HTSR. We’ll use a cutting speed of 400 SFM for standard machining. Let’s see what that stock removal looks like. For conventional machining, the RPM works out to 3200 RPM. We’ll use a feed rate of 0.003″ per tooth, using a standard 4 flute endmill. This means that we’ll be feeding the cutter at 38.4 inches per minute. Taking that same cut of 0.250 deep x 0.350 stepover, our 2D cut is 0.0875 square inches. To convert that to cubic inches per minute, we’ll multiply that by our feedrate. 0.1875 square inches x 38.4 inches per minute = 3.36 cubic inches per minute. Now let’s compare that to peel milling. To maintain the same 0.003″ chip thickness at 0.050″ stepover, the feed can be increased to 0.0051″ per tooth. Another perk of peel milling is that the RPM can also be bumped up. So let’s increase that RPM to 500 SFPM, using a 0.0051″ chip per tooth. This works out to 4000 RPM, and a feed rate of 81.6 IPM. As mentioned previously, the 0.050″ stepover and 1.000″ depth of cut works out to an area of 0.050 square inches. 0.050 square inches x 81.6 inches per minute = 4.08 cubic inches per minute. That’s about 15% faster material removal than the traditional approach. But the advantages of peel milling don’t end there. Maximizing Tool Wear One of the real disadvantages of the traditional roughing approach is that wear is very concentrated to the bottom of the end mill. Using that same previous example, what would our endmill look like after an hour of work? The bottom 0.250″ would be worn out, and the top 0.750″ would be totally fresh. Not really maximizing the use of the tool, is it? Now aside from the cost of the endmill itself, add the down time of the machine operator swapping the tool for a fresh endmill. Overall, it’s just not an efficient method. Now compare that to the tool that’s used for peel milling. What would that tool look like after an hour? Instead of all the wear focused on 25% of the tool, the wear would be evenly distributed across the entire flute length. Also, because of the small radial engagement, the individual flutes are actually in the cut for less time. Let me illustrate. To put it simply, the actual working time of the cutter’s flutes is about 1/3 of the time for peel milling compared to traditional milling. Does this mean that your cutters last 3x as long? Not always, in my experience. But I do tend to improve tool life noticeably, especially in hard to machine materials like titanium, inconel and cobalt chrome. Check back for the next installment: What’s Required for Peel and Trochoidal Milling? In the next article, Jonathan will discuss Trochoidal Peel Milling Toolpaths and what is required for Peel and Trochoidal Milling covering toolholders, cutting tools and cam systems. Check back soon!
1 Comment
9/17/2021 13:03:59
I appreciate your response about how peel milling is worth learning. A ton of people might assume that you only need to learn certain forms of milling. But peel milling could be one of those if it can help out.
Reply
Leave a Reply. |
AuthorWe've compiled the latest news and technical information about our principals and our market that we hope you find informative! Archives
June 2024
Categories
All
|
|
Browne & Co., Inc.
9605 Tanager Drive Chardon, Ohio 44024 |
© 2024 Browne & Co., Inc. All Rights Reserved
web design by Rapid Production Marketing |

 RSS Feed